WinToFlash is an application that can be used to install Windows, such as Windows Vista, 7, 8, 10, and others, without using a DVD. The WinToFlash application is typically used to install Windows using a flash drive.

WinToFlash works by extracting content from an installation CD, such as Windows Vista, 7, 8, and 10, and then preparing a USB drive to replace the operating system installation CD. But do you know how to download, install, and then use the WinToFlash application?
This article will explain the WinToFlash application in detail, from downloading, installing, and then using it.
How to Use WinToFlash for Beginners
The advantages of WinToFlash include:
- The WinToFlash application can make a USB drive bootable.
- The WinToFlash application can be used to install various versions of the Windows operating system.
- This application also won't damage a USB drive when used to install Windows.
- It's easy to use, and you can easily extract or copy RAR/ISO files quickly and safely.
With these advantages of the WinToFlash application, you can use it by following the steps below:
1. Download WinToFlash
You can download the WinToFlash application by following the steps below. In the method below, I downloaded the WinToFlash application, which is available on the Nesabamedia website. Here's how to download it:
- To download WinToFlash, go to the Nesabamedia website and search for the WinToFlash application on the website using the search bar in the top right corner. Or, you can download it directly here.
- After clicking the link, scroll down until you find the blue Download Now button, and click it.
- Selanjutnya, Anda dapat menunggu beberapa saat sampai aplikasi tersebut selesai di download.
2. Installing WinToFlash and How to Use It
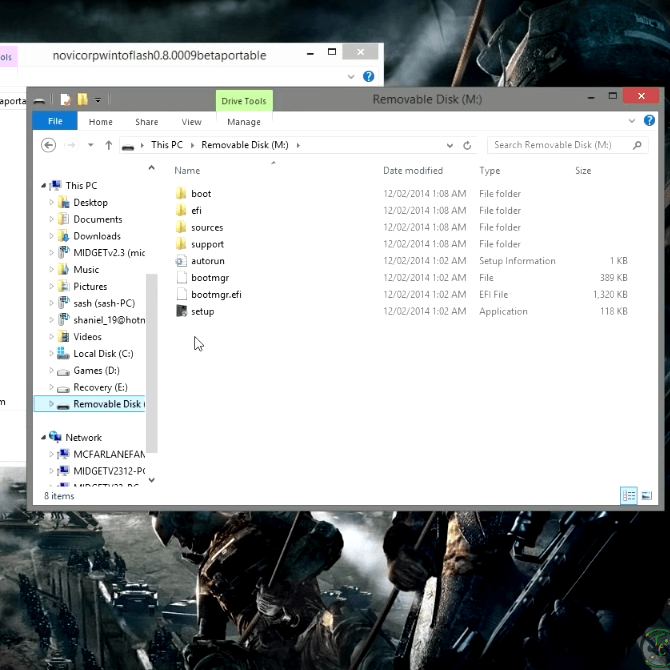
- Once you've downloaded the WinToFlash application, navigate to the folder where the application is located. Then, double-click the WinToFlash installer.
- After that, a Wizard will appear, and you must click Next to continue installing the application.
- Next, you must check the box in the wizard, as shown in the image below. Once done, you can click Next again.
- Klik Next.
- in this step you just have to wait a few moments.
- After that, you can click the Next button again.
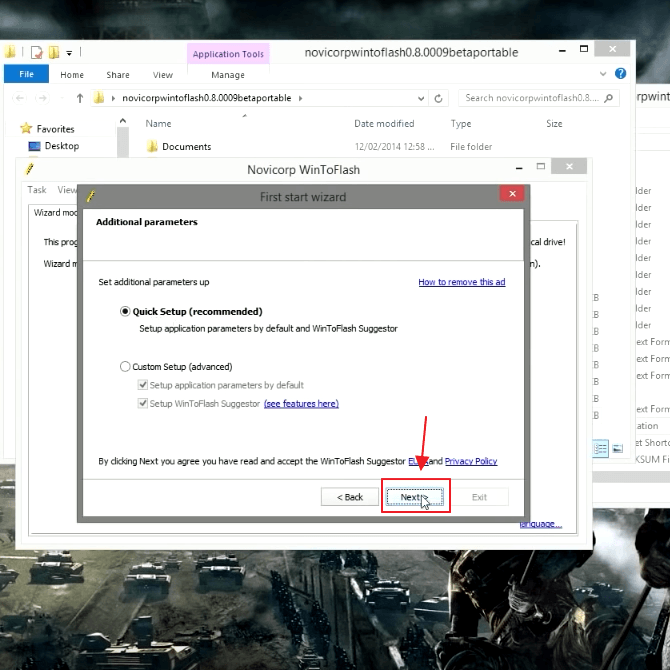
- Select Quick Setup from the options that appear in the wizard box and click Next.
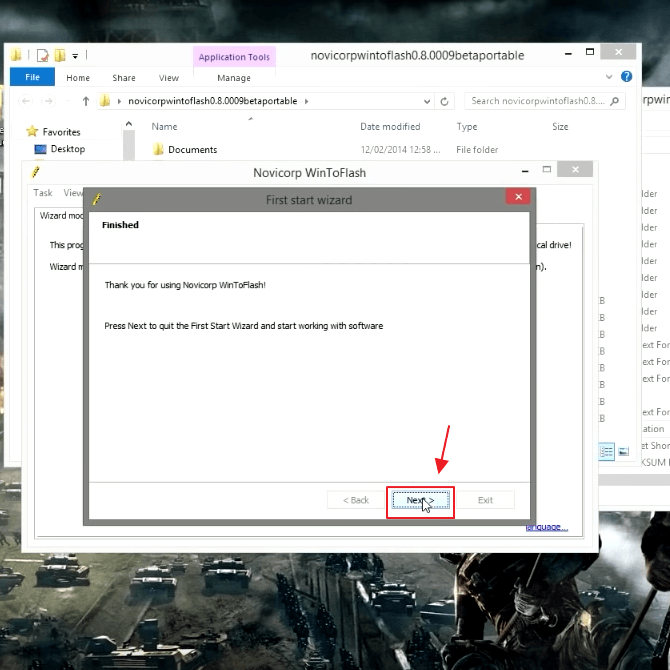
- To complete the installation, you can click Next again.
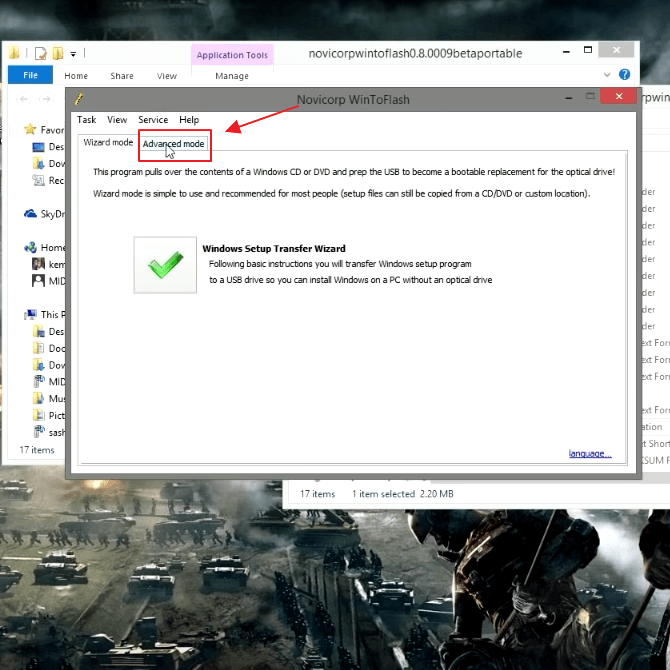
- After that, two modes will appear: Wizard mode and Advanced mode. You should click Advanced mode.
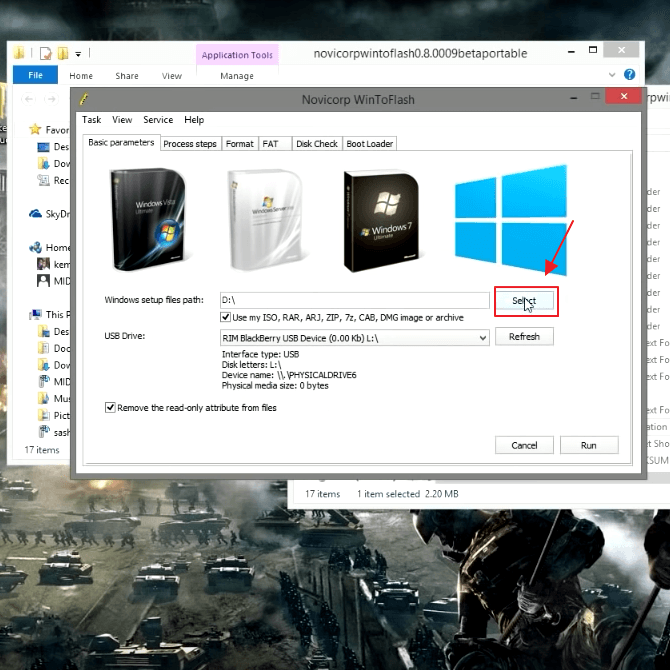
- At this stage, you can choose your Windows Setup. To do so, click the Select button.
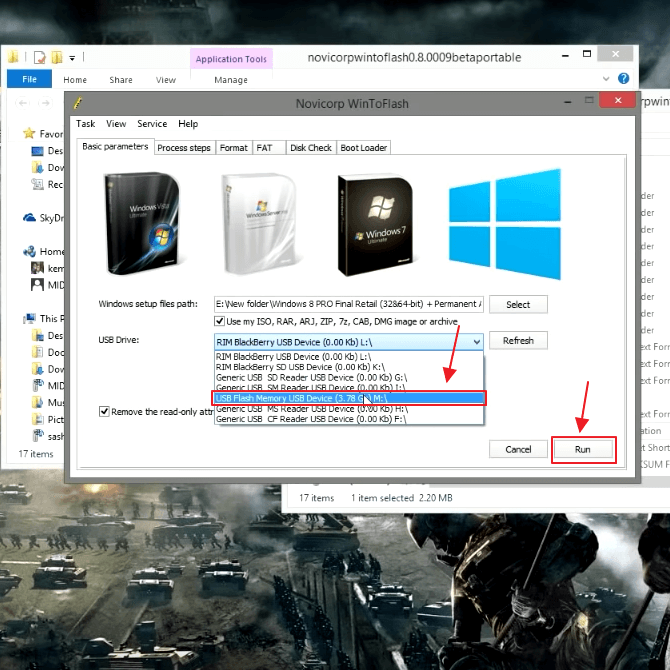
- Once you've selected the Windows setup files path, you can also select the USB drive installed on your computer. Once selected, click Run.
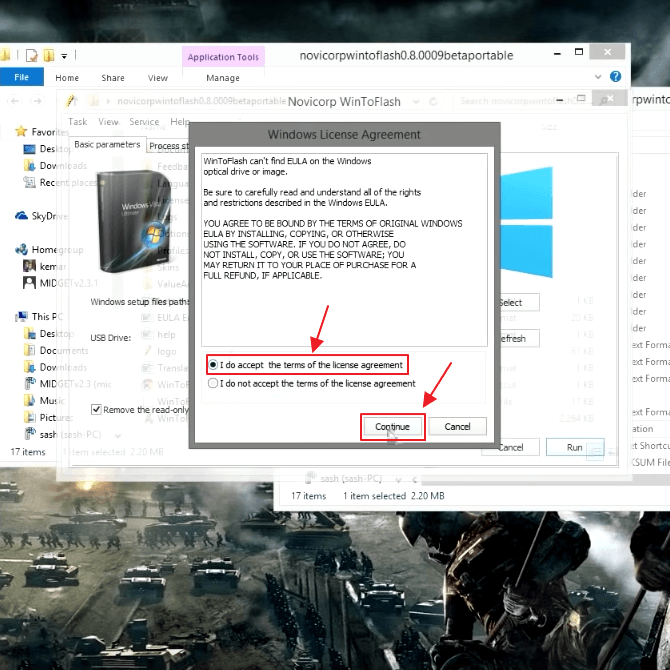
- Next, you can select I do accept the terms of the license agreement and then click Continue.
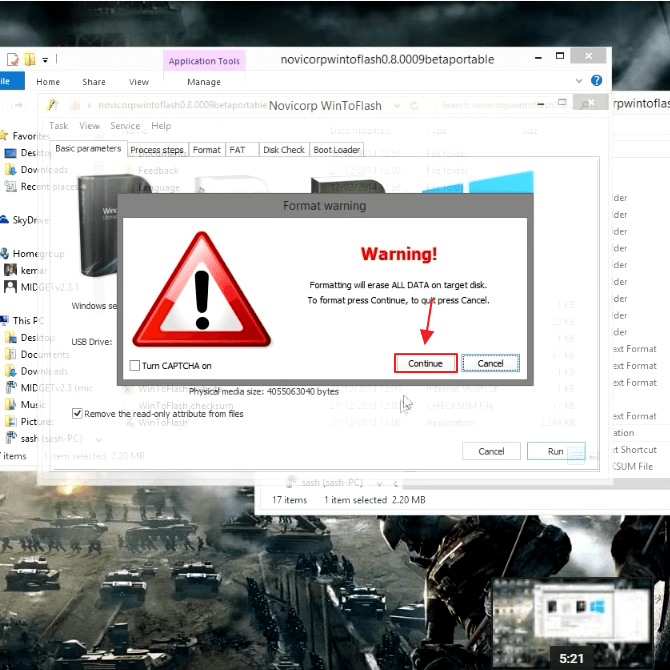
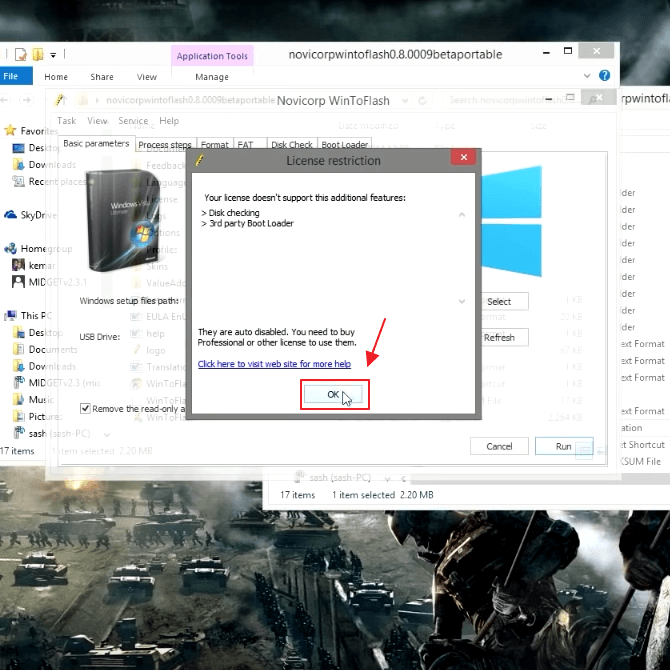
- Then a warning box will appear, you can click Continue to continue.
- Klik OK.
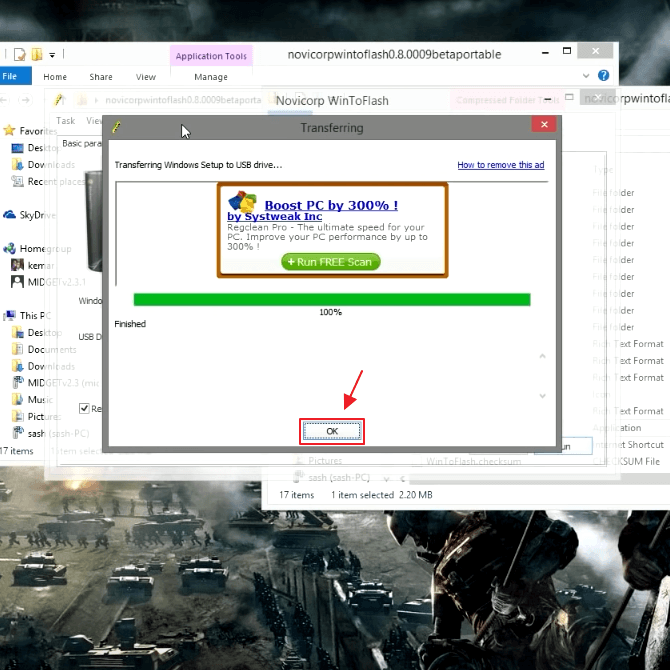
- At this stage, you can wait a few moments for the process of transferring Windows Setup to your USB Drive.

- If it has reached 100%, then you can click OK in the transferring box.
- If you have followed the steps above, your flash disk can now be used as a bootable Windows.